How to begin Android automation testing using Appium, JUnit5, and Kotlin


Automatic regression testing is almost mandatory when you are developing an application with many features. It consists of testing a functionality over time and making sure it does not break.
We have a strong culture of testing and each team regularly writes unit tests (extensively) and UI tests which the dev teams maintain. Those tests are run using mock and simulator.
Table of contents
The importance of automatic regression testing
In order to save time, avoid repetitive tasks, and increase efficiency and productivity, our QA team started to create automation tests but with real devices. These tests are end-to-end without any fake or simulated results.
They are intrinsic to the overall quality of our applications. When they are implemented using continuous integration tools (such as Jenkins or CircleCi) in order to create nightly checks, they allow each team to quickly check regressions and prevent bugs.
However, this process is complex to set up because you need the right tools to interact automatically with the application on a multitude of different devices. Creating these tests is also time-consuming and requires regular maintenance.
To achieve this goal we recommend using Appium in combination with JUnit 5 and Kotlin.
- Kotlin is loved by our developers, who are experts in their fields! It is a concise, safe, and modern programming language. In this project, we use a JVM so it can work with any OS and use any Java libraries.
- JUnit is a framework for unit testing. With it, it is easy to manage a rich suite of tests, especially regression tests. JUnit has become a standard for testing, it is supported by all IDE and by a great community.
- Appium is a test automation framework, particularly used for mobile automation. It can simulate any gesture or any command on any platform. It is built on the idea that you don’t need to rebuild your app to test it and is very easy to set up.

In this article, I'll walk you through the steps of how to configure a project so you can start automating your Android application tests. We'll use the Google Android calculator as an example and test a simple operation with it. With today's automation, we will test 8 x 5 = to see if it’s equal to 40!
How to start setting up your project
To get started, make sure you have the Android SDK and download Appium if you don't already have it. Additionally, here's a very fast way to get Appium if you have npm:
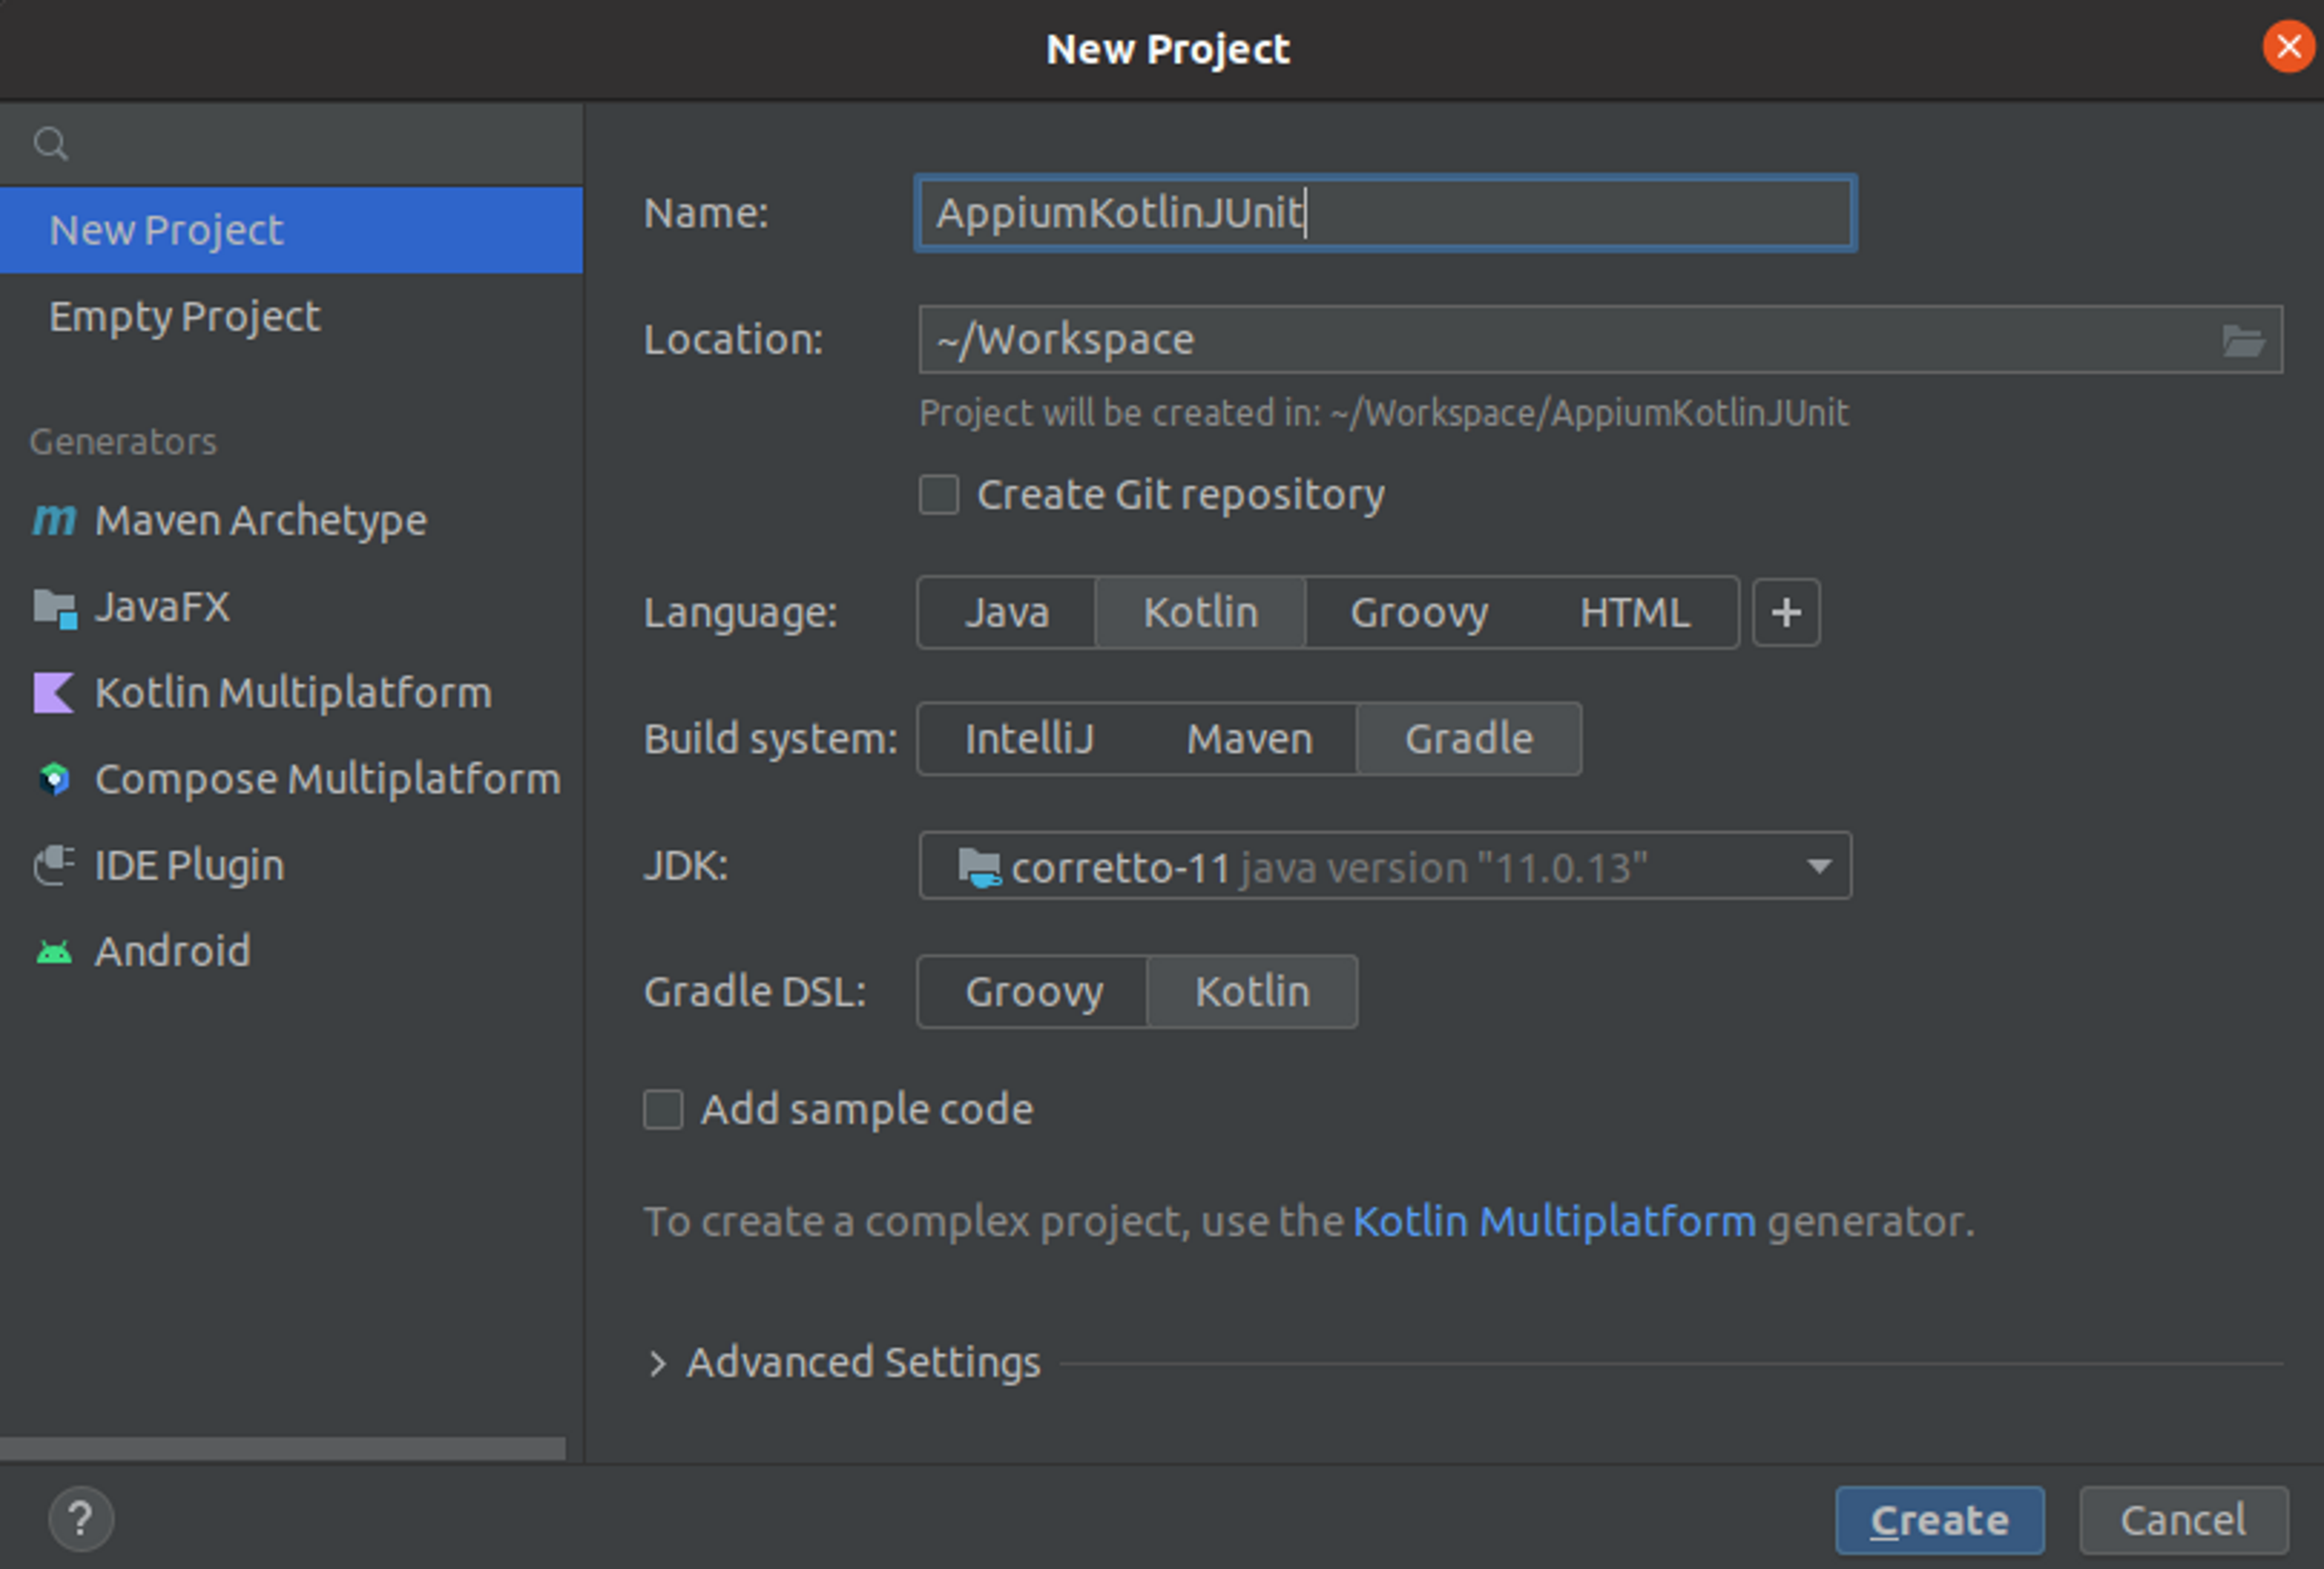
npm install -g appiumTo get started and create a project, select Kotlin and Gradle. Here, I am using Intellij IDEA as an IDE.
In the build.gradle add the following dependencies to access Appium and JUnit.
1dependencies {
2  testImplementation(kotlin("test"))
3  testImplementation("org.junit.jupiter:junit-jupiter-api:5.8.2")
4  testRuntimeOnly("org.junit.jupiter:junit-jupiter-engine:5.8.2")
5  testImplementation("io.appium:java-client:7.6.0")
6  testImplementation("org.seleniumhq.selenium:selenium-java:4.1.4")
7}
Now we're creating a new Kotlin Class called AppiumSetup in the test folder. The purpose of this class is to set up the specific device and application we want to test. We'll use a base class for all test classes. Everything in this class is going to be in a companion object because all methods and attributes are static.
Choosing your Appium driver capabilities
Next, we need to set up an Appium driver and make sure it has the necessary capabilities to interact with an Android app.
1lateinit var driver: AppiumDriver<MobileElement>
2private val caps = DesiredCapabilities()All capabilities are defined HERE.
To keep it simple today, we're only going to define the following 4 capabilities.
1 ) App Package: Package of the app.
2 ) Activity Name: Full path to Activity that we want to test, i.e. com.package.SampleActivity.
You can get both of them by doing an "adb logcat | grep LAUNCHER" and then launching the activity.
Below you can see the package marked as green and the activity marked as red for the Google calculator application.

3 ) Automation Name: Automation engine that Appium is using.
4 ) Platform Name: Mobile OS platform that Appium is using.
1private const val appPackage = "com.google.android.calculator"
2private const val activityName = "com.android.calculator2.Calculator"
3private const val automationName = "UiAutomator2"
4private const val platformName = "Android"
5private const val serverUrl = "http://localhost:4723/wd/hub"Then update all capabilities using the @BeforeAll of JUnit.
1@JvmStatic
2@BeforeAll
3fun setUp() {
4    caps.setCapability(MobileCapabilityType.PLATFORM_NAME, platformName)
5    caps.setCapability(MobileCapabilityType.AUTOMATION_NAME, automationName)
6    caps.setCapability(AndroidMobileCapabilityType.APP_PACKAGE, appPackage)
7    caps.setCapability(AndroidMobileCapabilityType.APP_ACTIVITY, activityName)
8    caps.setCapability(AndroidMobileCapabilityType.AUTO_GRANT_PERMISSIONS, true)
9    driver = AndroidDriver(URL(serverUrl), caps)
10}To avoid any errors when running multiple launches, don’t forget to quit the driver at the end. This needs to be done in the @AfterAll of JUnit because this method is launched after all tests, even if a test fails.
1@JvmStatic
2@AfterAll
3fun tearDown() {
4    driver.quit()
5}How to get your gesture IDs
In order to simulate various gestures by using any button with Appium, we need to establish the ID of what we want to click on. To do this we need one of the following tools: Appium inspector (for Windows or Mac) or UIAutomator (Linux).
If you are on Linux you can find UIautomator in android_sdk_path/tools/bin/UIautomator
Tips for Linux users
- Download Google Calculator on the Google Play Store with your Android device.
- Plug your Android device into your computer and verify that you are connected with adb by doing an
adb devices - Launch UIAutomator and click on the “Device Screenshot” button.

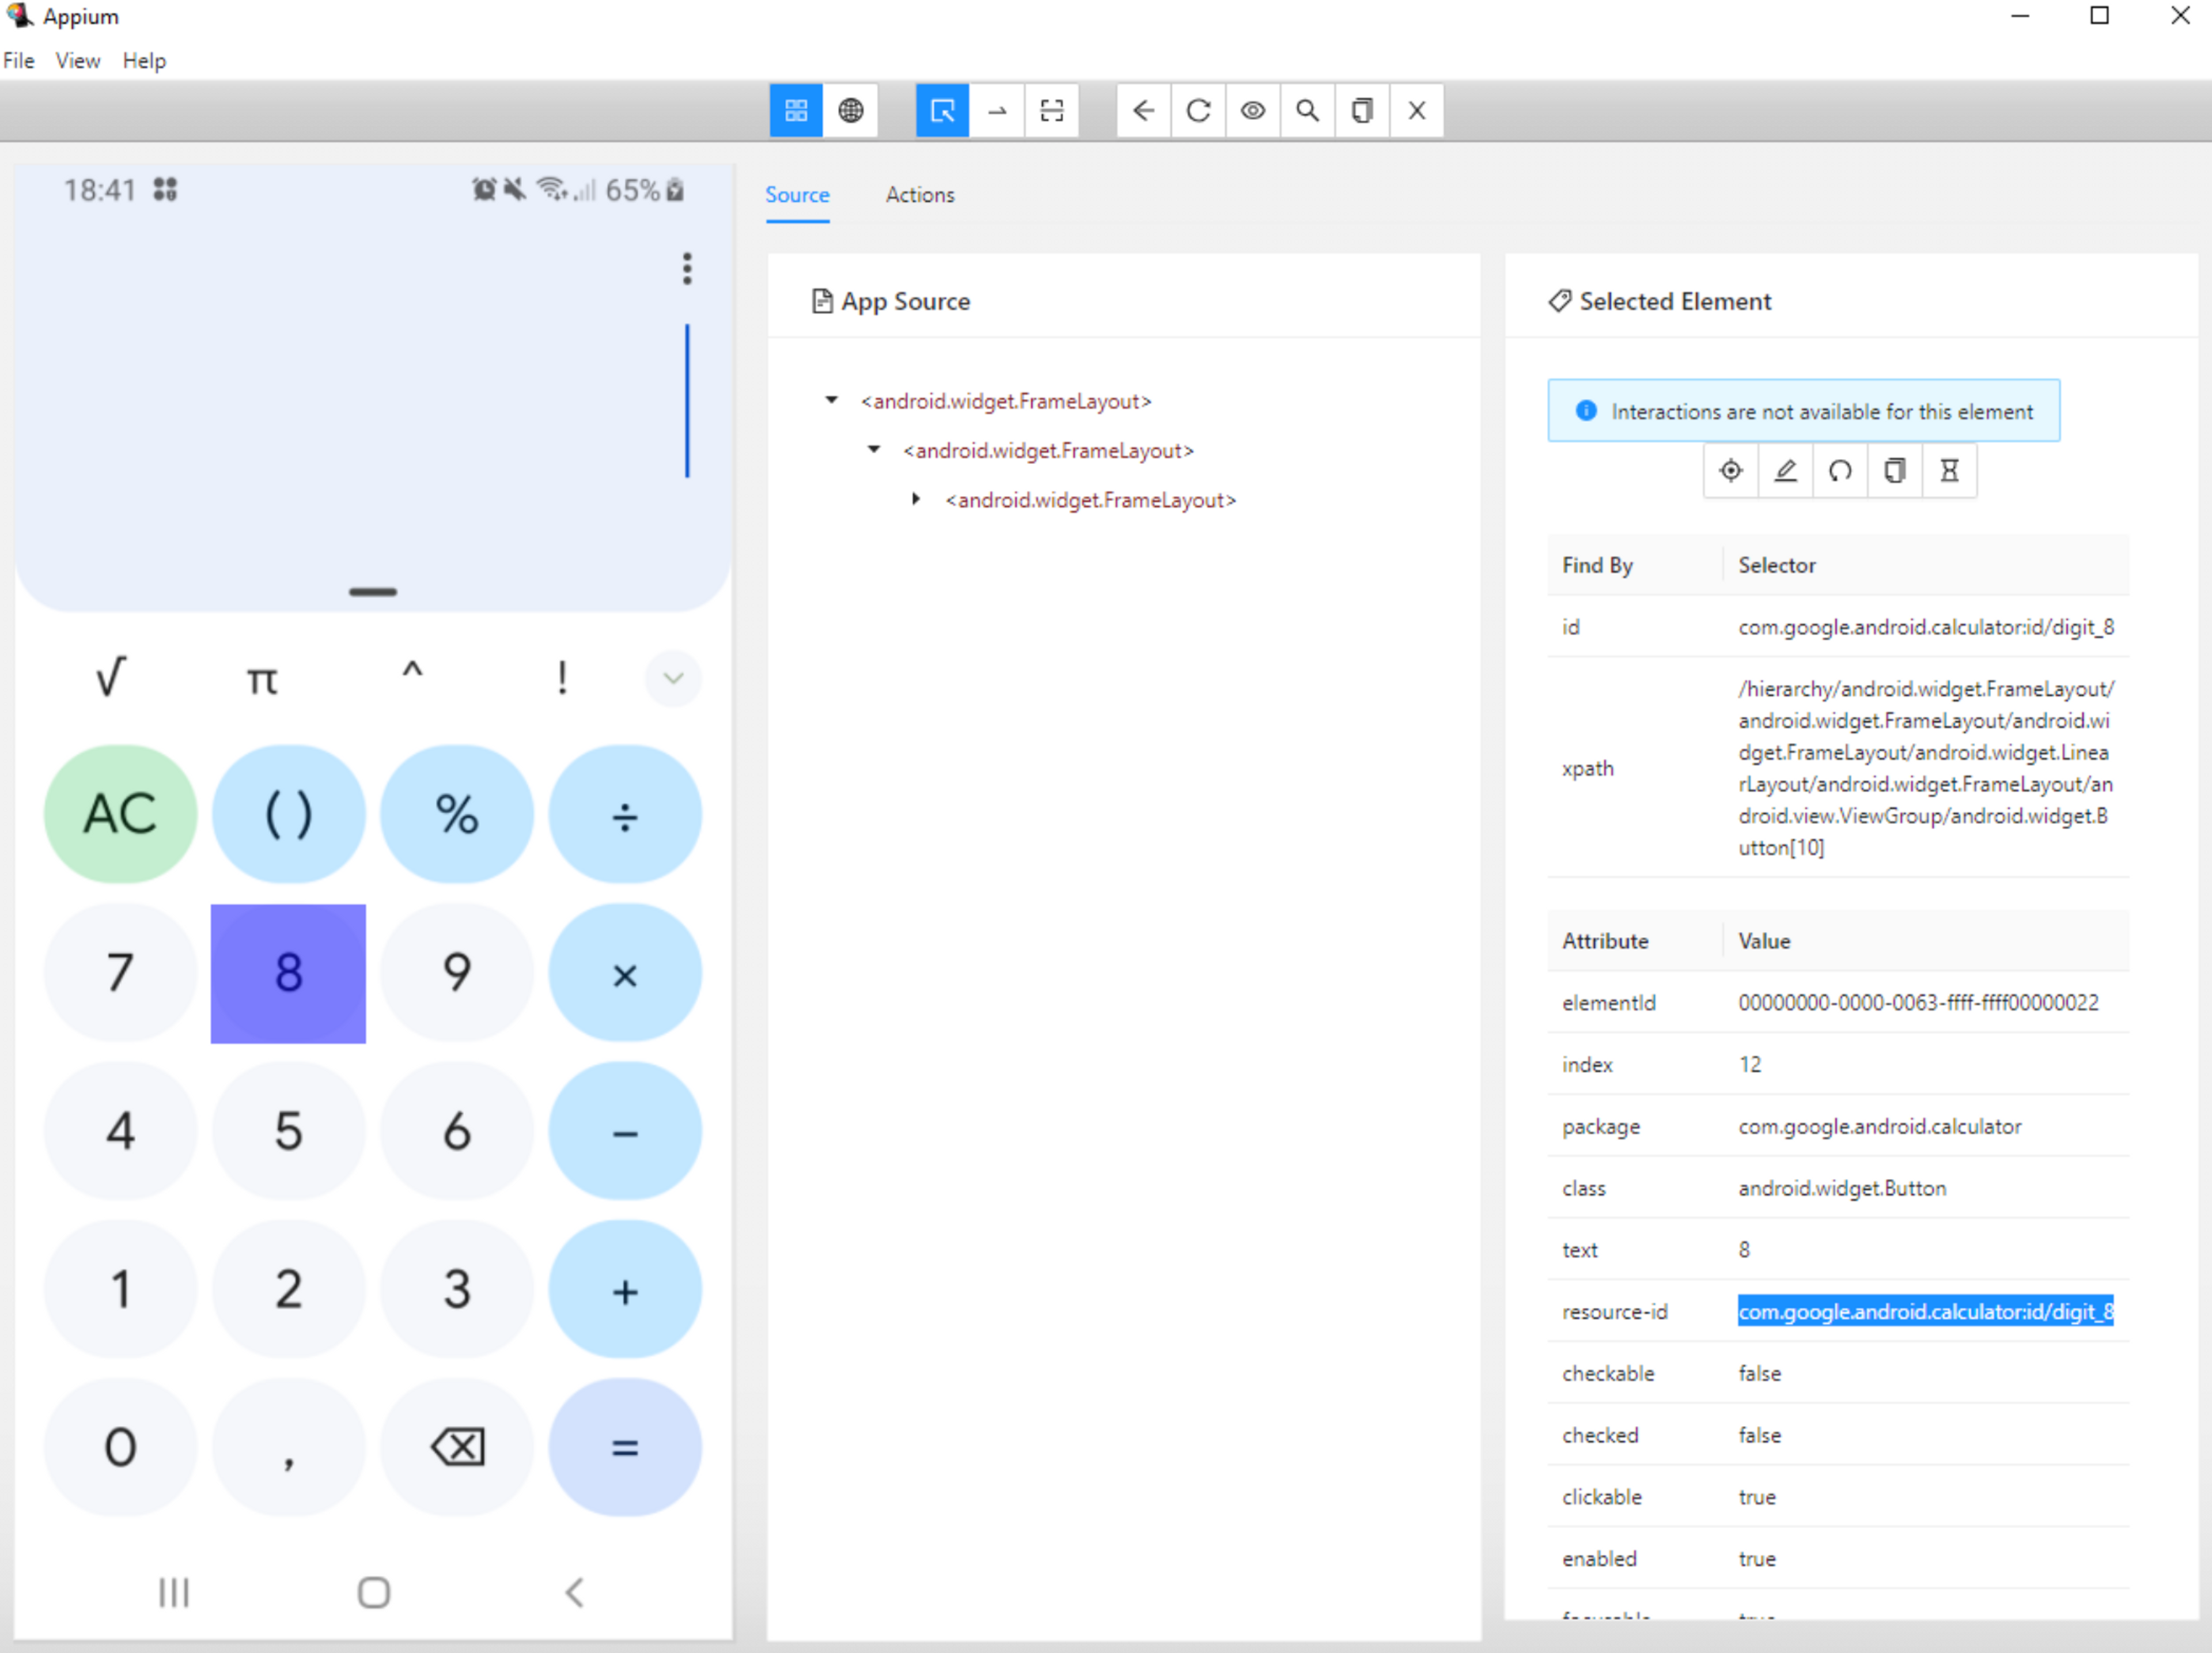
UiAutomator is taking an “xml screenshot” of your device. Therefore, if you have the Google calculator open, then you will receive the following image.
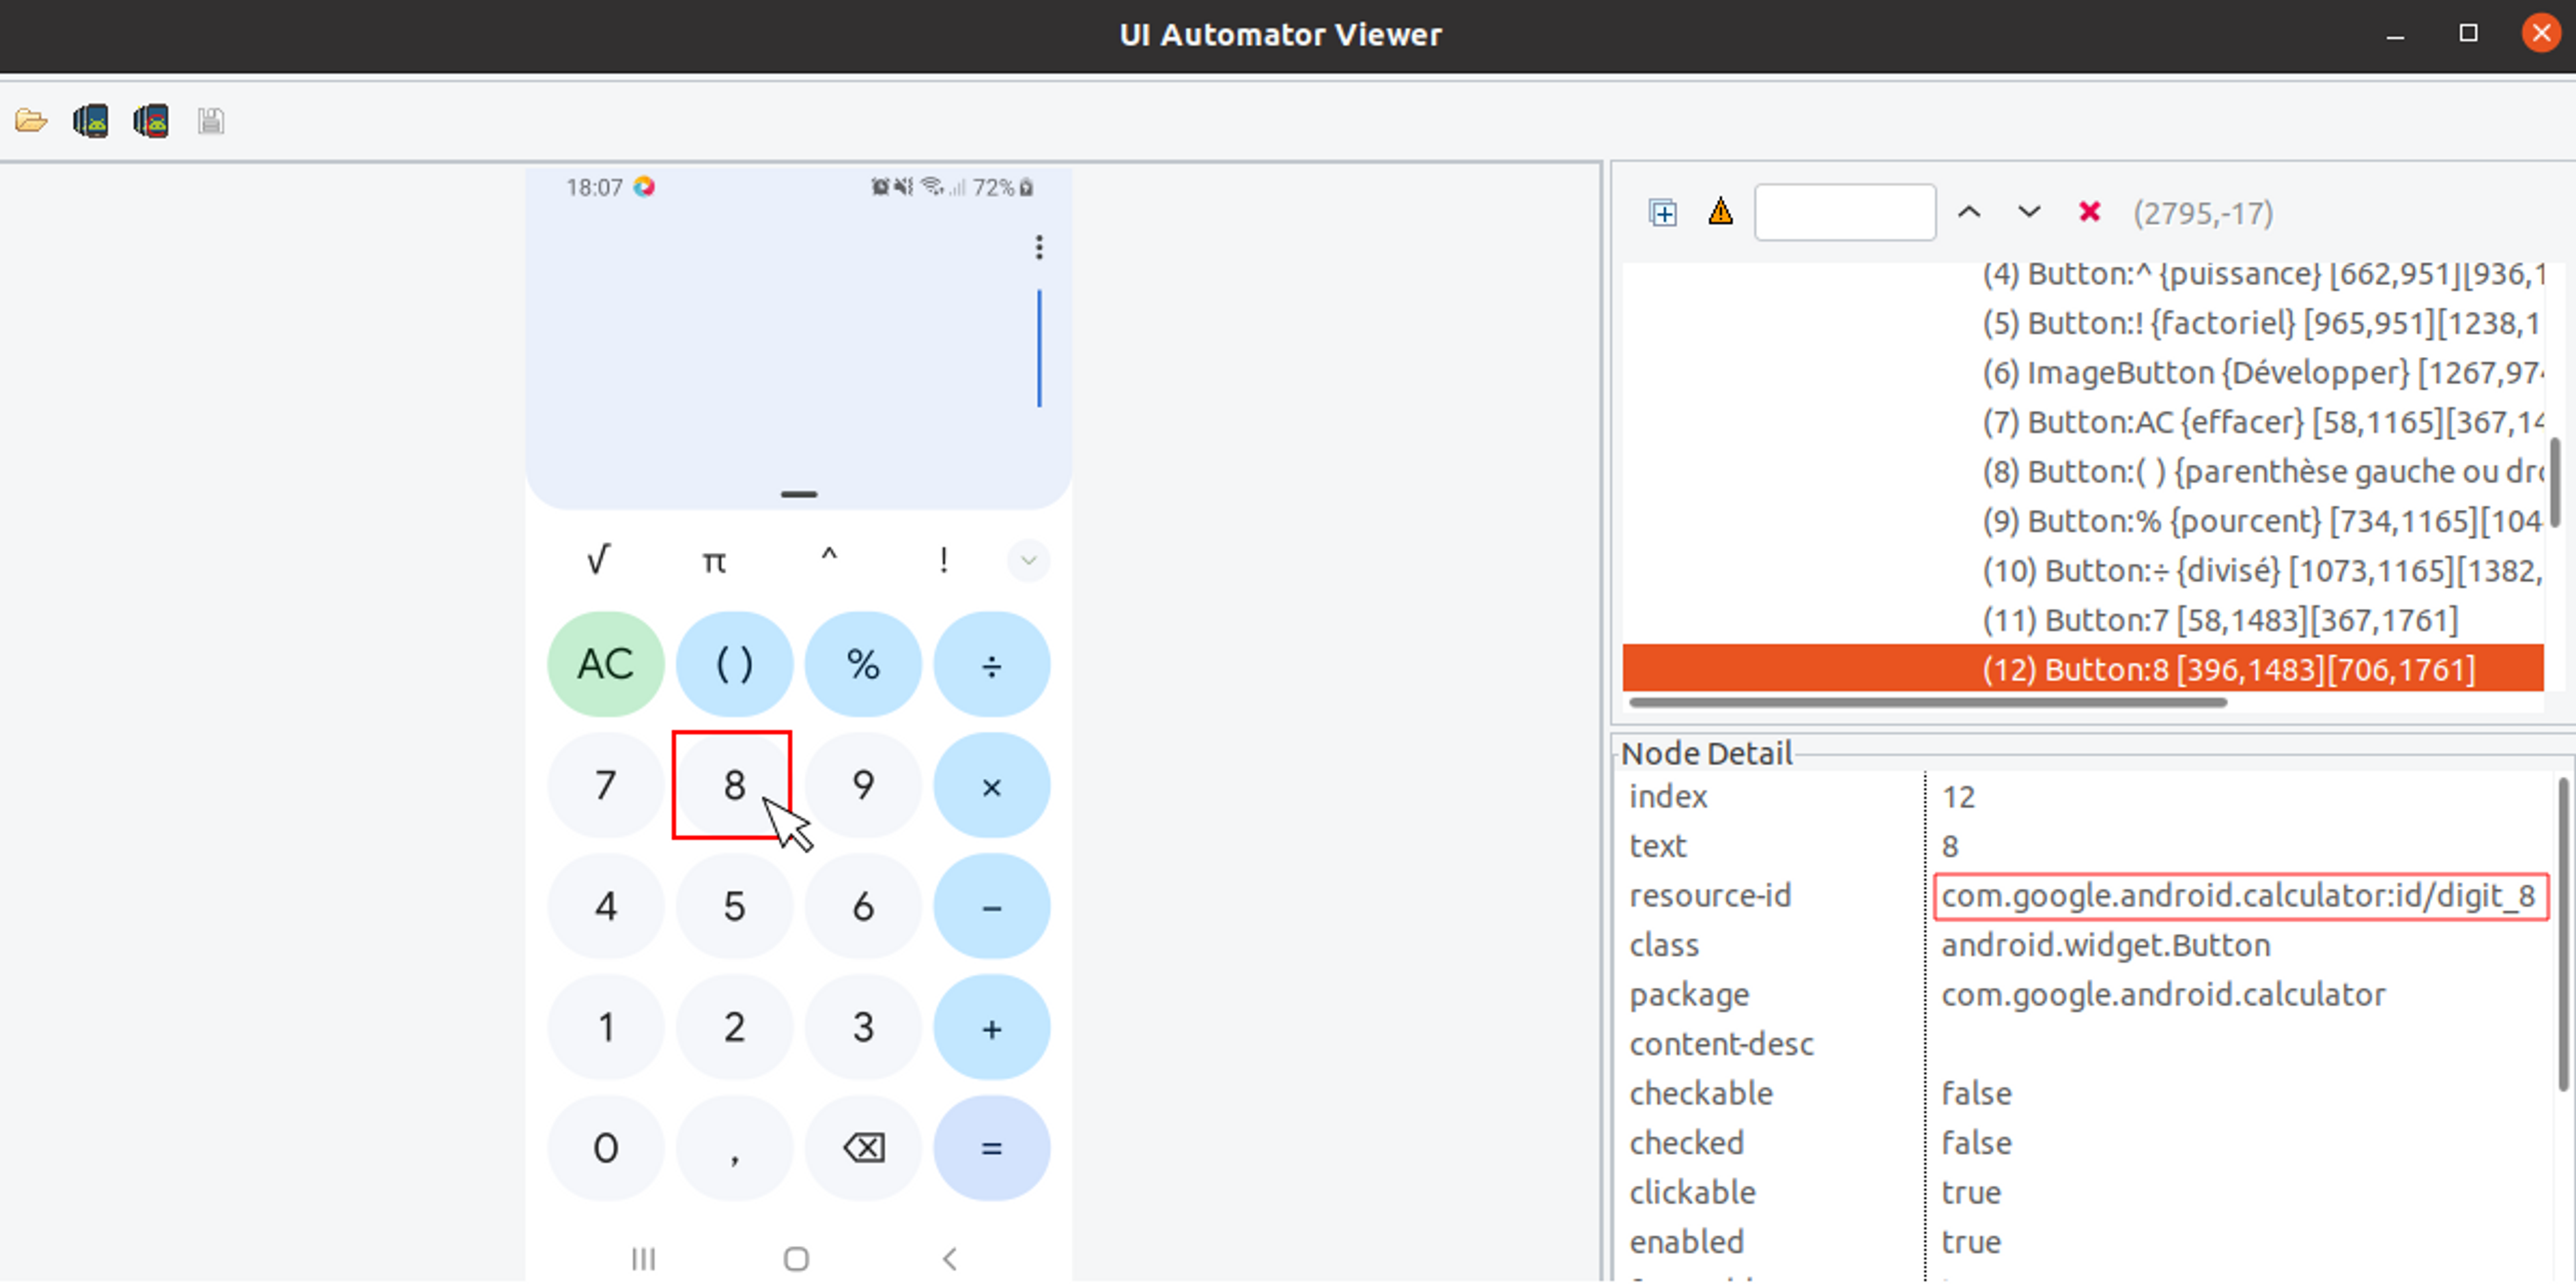
Now if you click on any element you can get the resource-id of that element.
Here we can see that the resource-id of button 8 is “com.google.android.calculator:id/digit_8”
Tips for Mac or Windows Users
The process for Mac and Windows users is very similar to Linux, but instead, we use AppiumInspector.
- Plug your Android device into your computer and verify that you are connected with adb by doing an
adb devices. - Launch the Google calculator app on your device and run the Appium server.
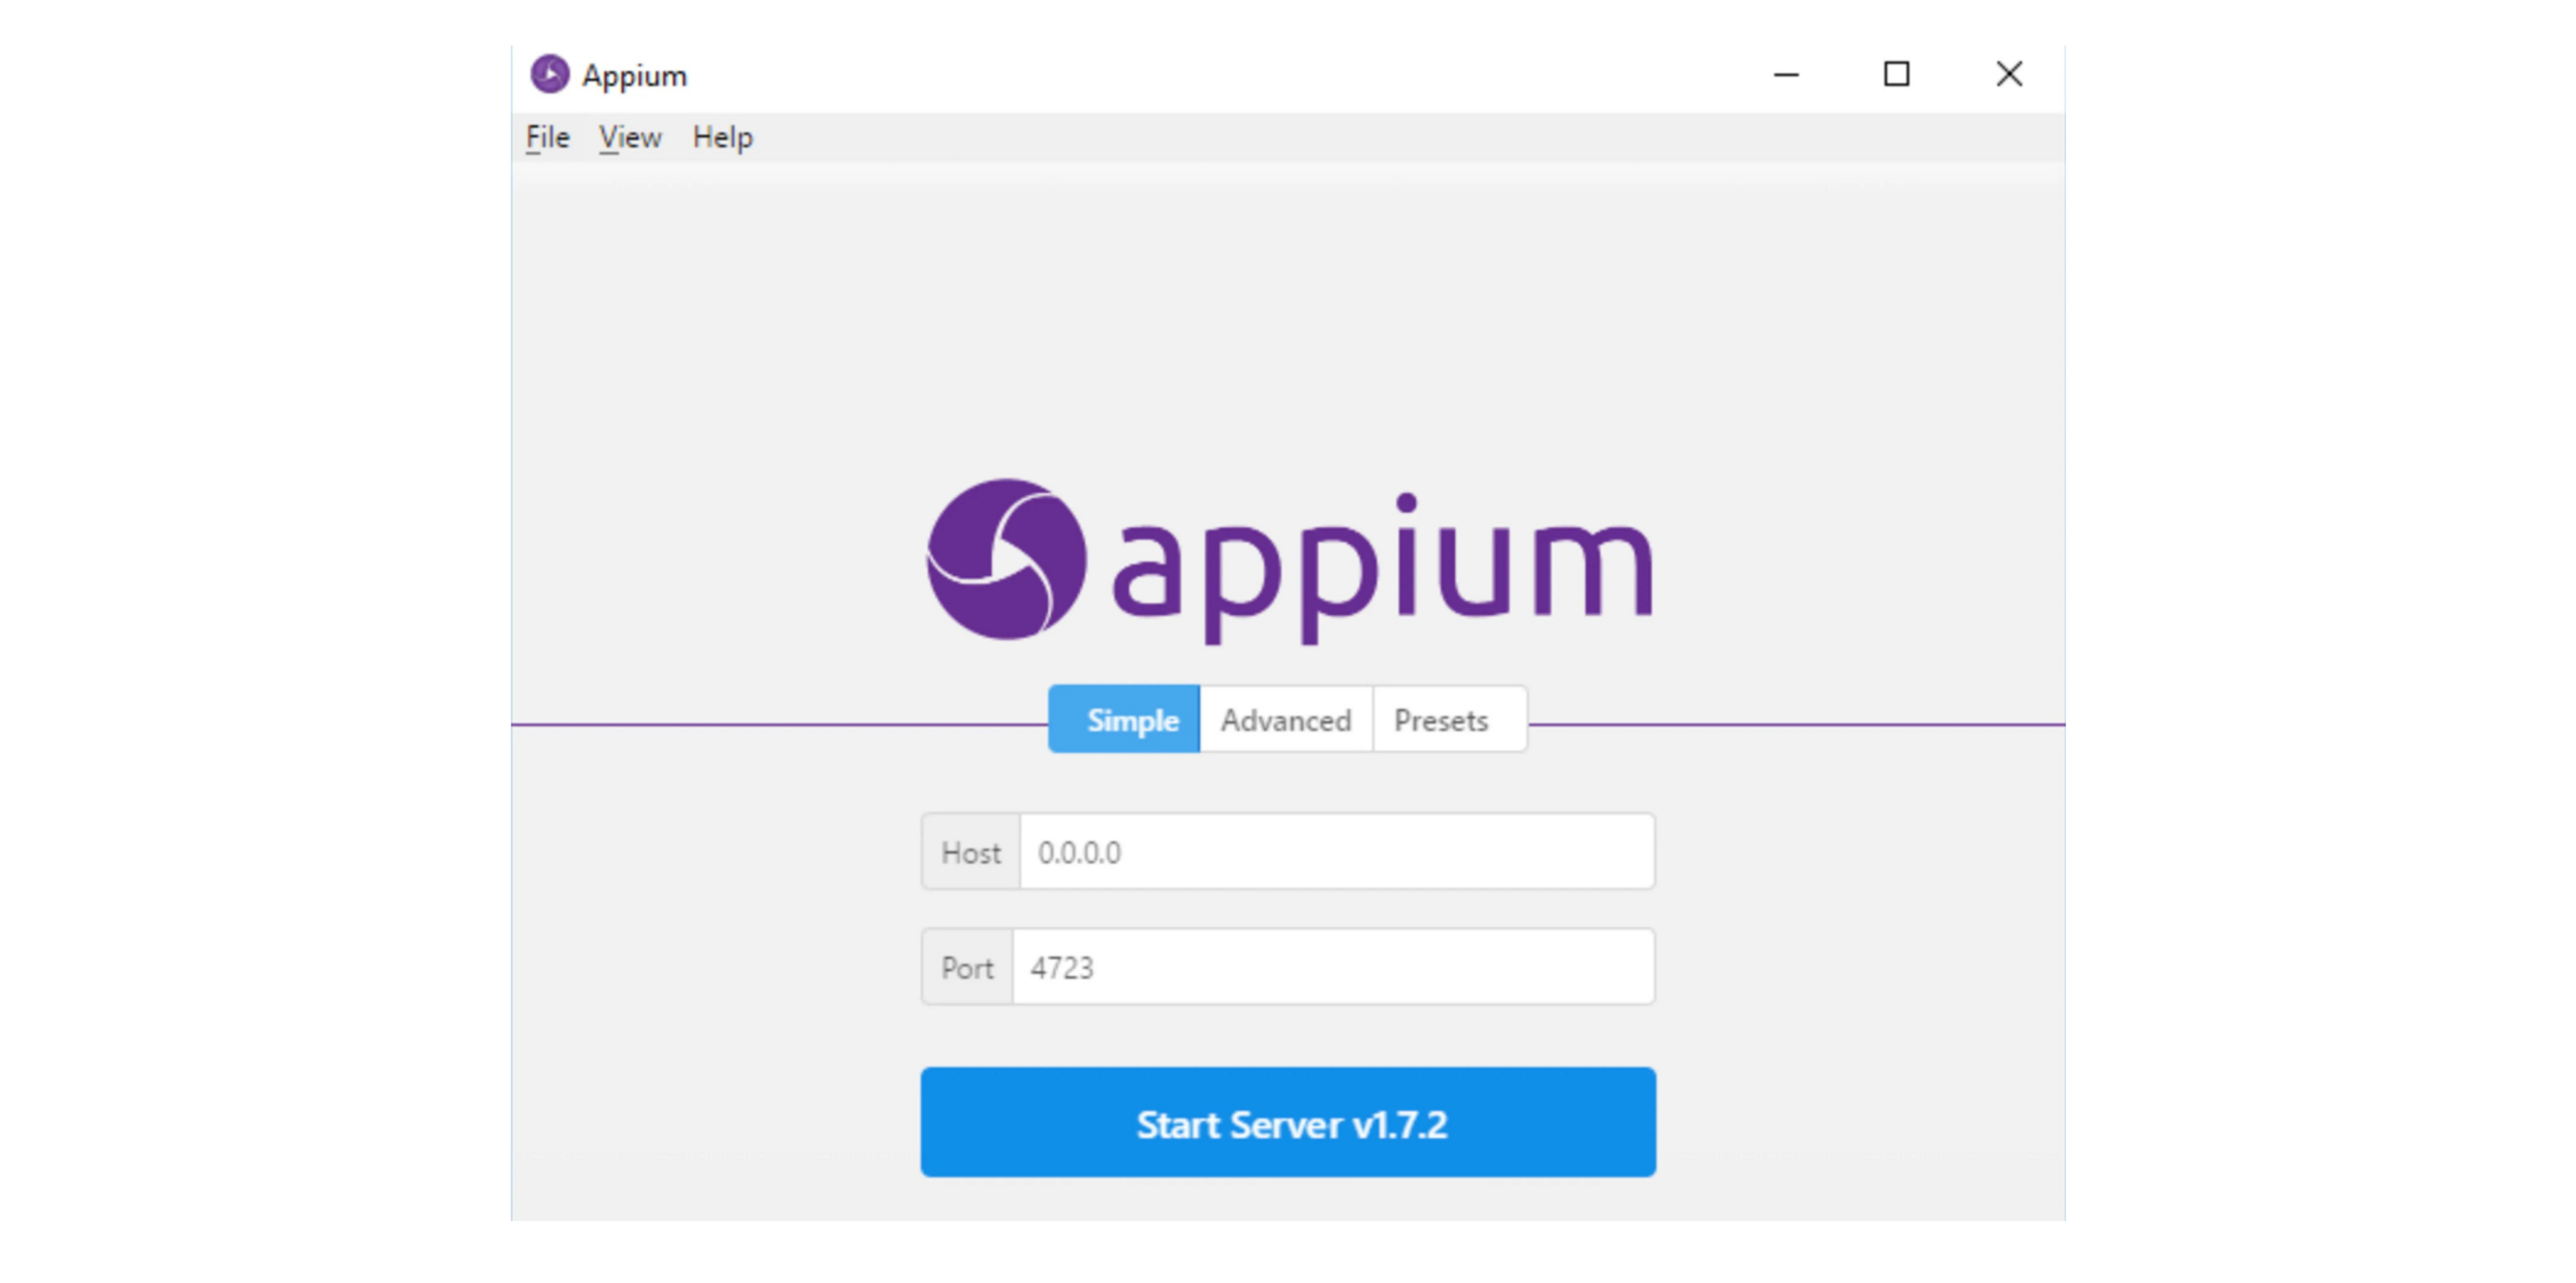
- Either with the command line
appiumif you are using npm or with the GUI and the button “Start Server”.
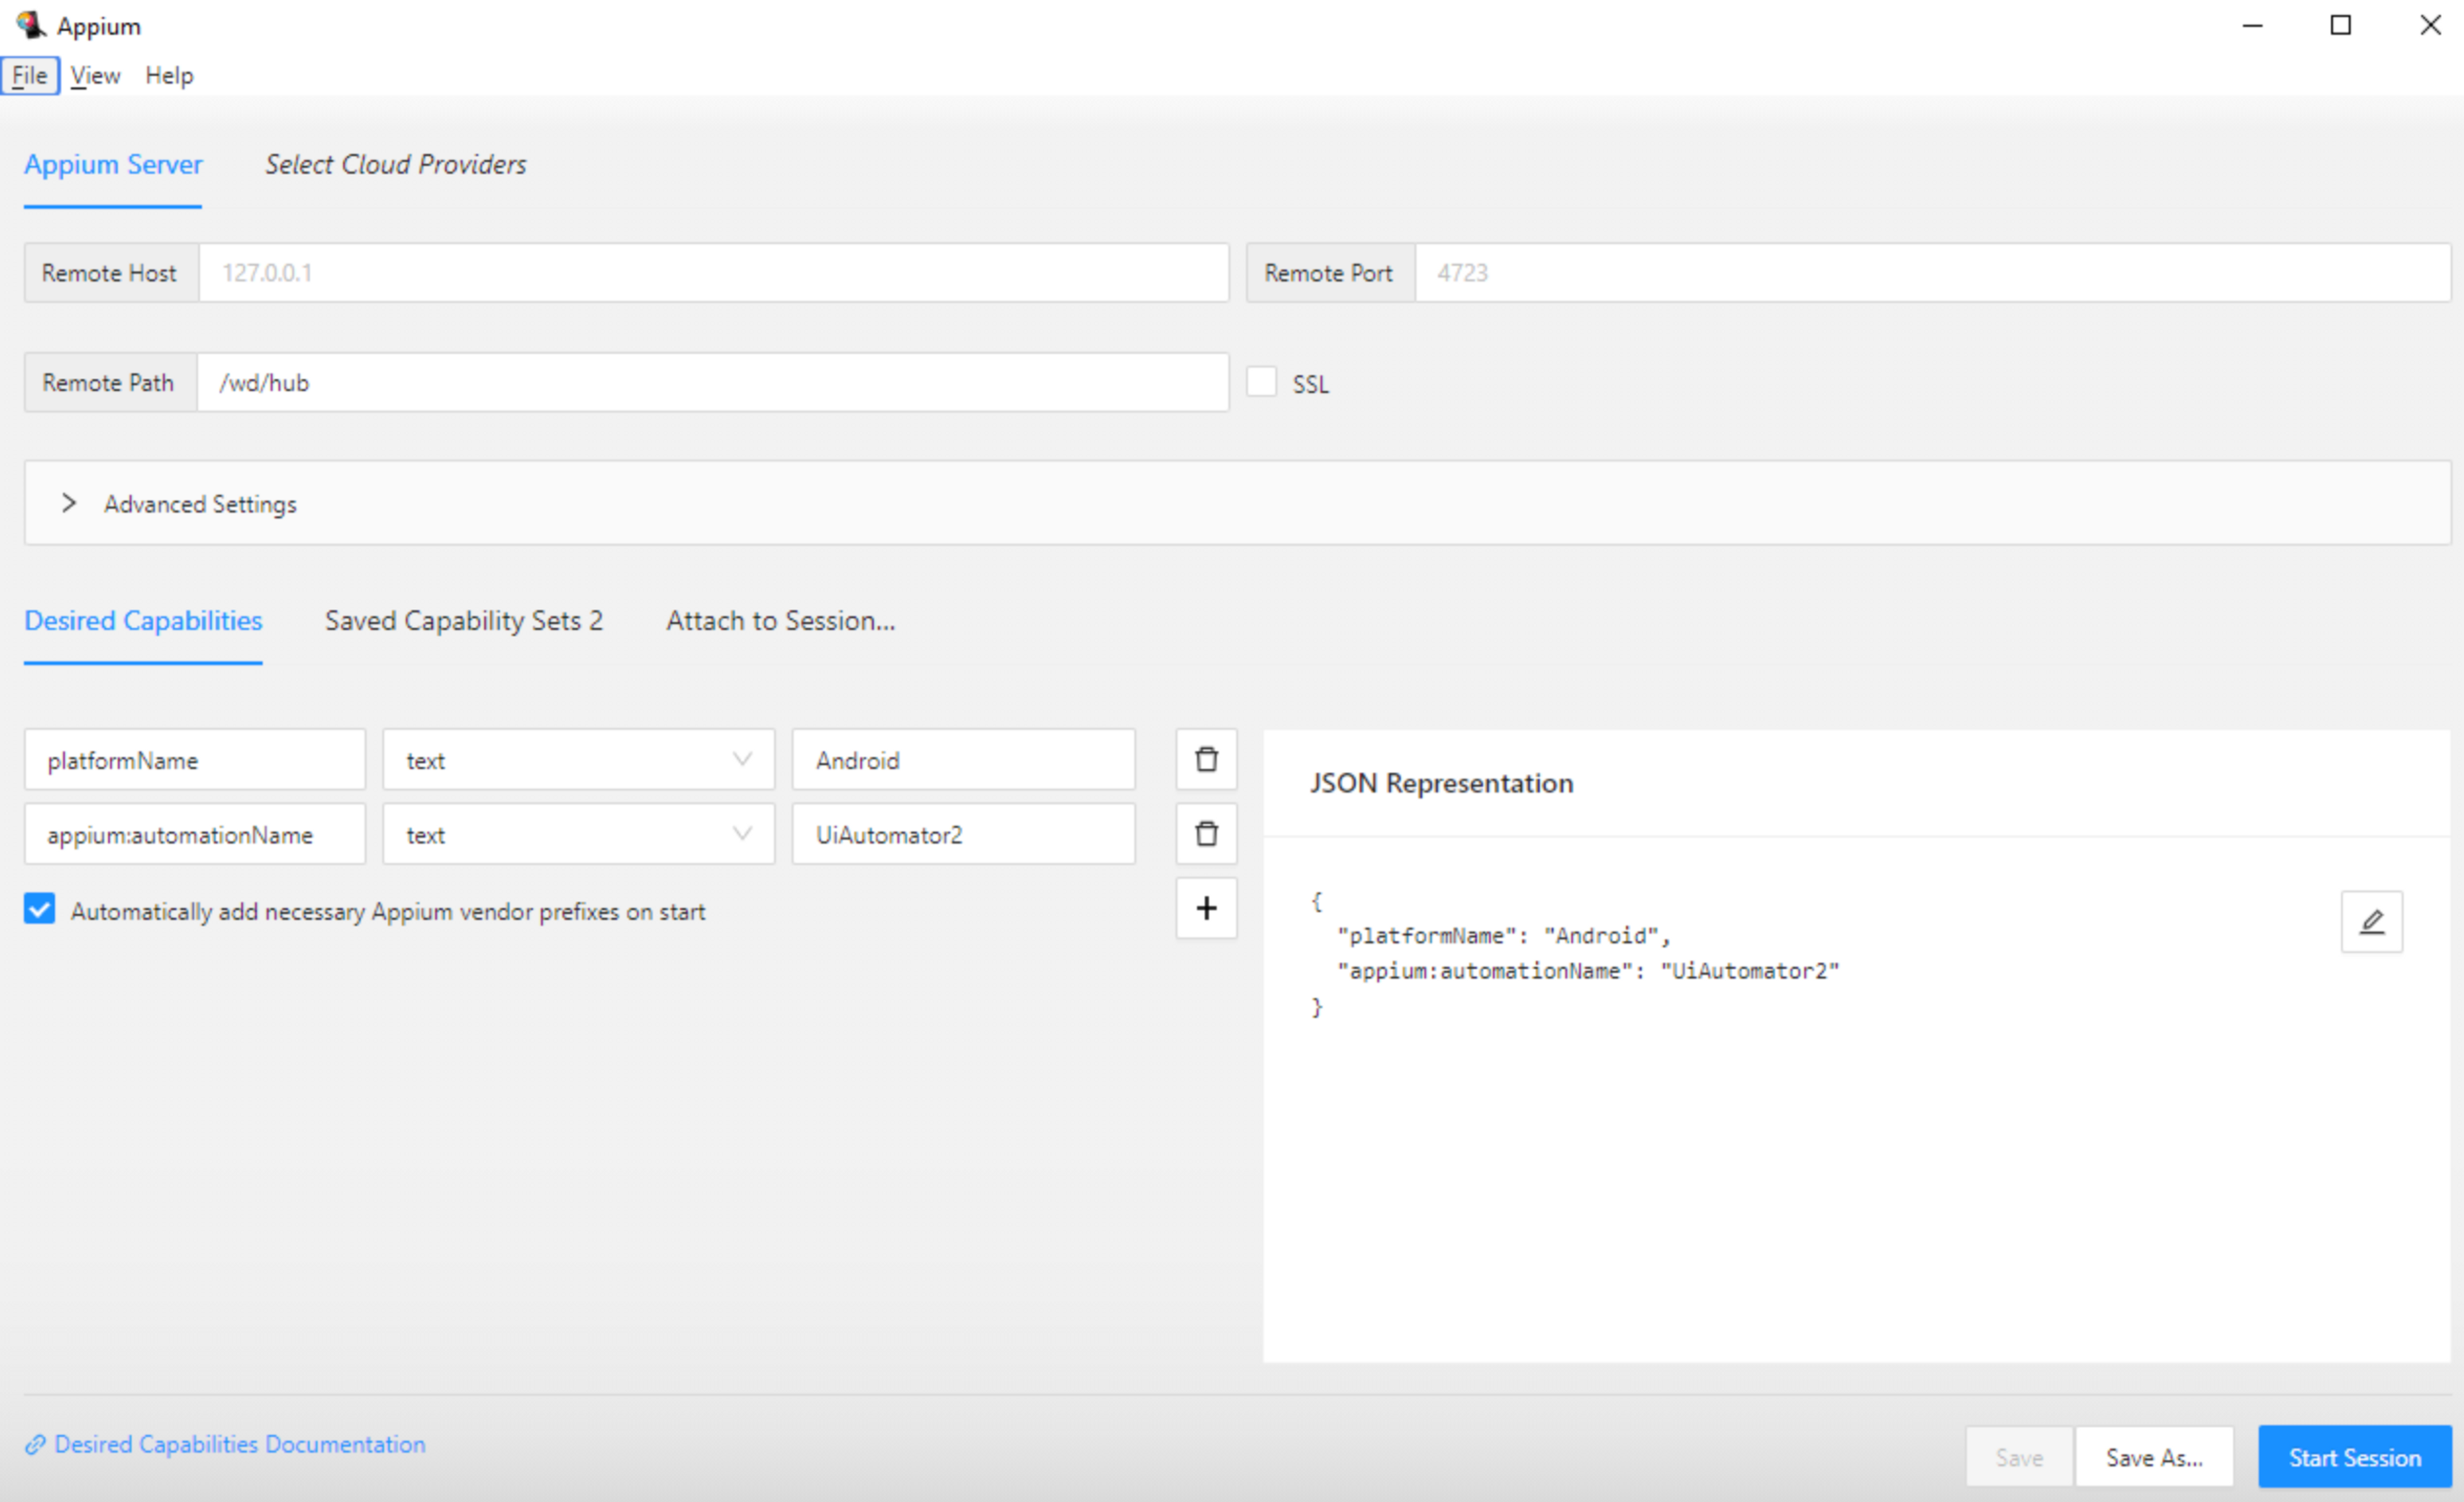
Then launch AppiumInspector and enter the following parameters:
“platformName” : “Android”
“automationName” : “UiAutomator2”Don't forget to set up the remote path with: /wd/hub
Finally, you can click on "start session".
Now, if you click on any element, you can get the resource ID of that element.
For example, here we can see that the resource ID of button 8 is “com.google.android.calculator:id/digit_8”
How to implement a simple Google calculator application test
After setting up Appium, we now have all the IDs that we need to make a simple multiplication test: [5], [x], [8], and [=]
A good practice is to create another file called ViewIds.kt where we define all of our const values.
1const val DIGIT_5: String = "com.google.android.calculator:id/digit_5"
2const val DIGIT_8: String = "com.google.android.calculator:id/digit_8"
3const val MULTIPLICATION: String = "com.google.android.calculator:id/op_mul"
4const val EQUAL: String = "com.google.android.calculator:id/eq"You can define classes to group your tests. In this example, the class MultiplicationTests is the class where we run all multiplication tests. With this final tip, we're finally ready! We can now create a test to check this simple multiplication problem: 5 x 8 is 40.
1import org.junit.jupiter.api.Test
2import org.openqa.selenium.By
3import kotlin.test.assertEquals
4class MultiplicationTests : AppiumSetup() {
5    @Test
6    fun `Simple multiplication gives correct result`() {
7        // Let's implement this !
8    }
9}We are using two functions to make the operation: .findElement(By.id(X)) and .click()
1driver.findElement(By.id(DIGIT_5)).click()
2driver.findElement(By.id(MULTIPLICATION)).click()
3driver.findElement(By.id(DIGIT_8)).click()
4driver.findElement(By.id(EQUAL)).click()We then store the result that is appearing on the TextView in the variable result. In this case, there is only one TextView result on the screen, so we don’t have to specify which one we are looking at.
1val result = driver.findElement(By.className("android.widget.TextView")).textAnd finally, we assert that this variable is equal to 40, otherwise the test fails.
1assertEquals("40", result)Perfect! Now we're ready to launch our first test.
Before launching the test, make sure you check the following two steps:
- Your device is connected with adb to your computer and you can see it with
adb devices. - Your Appium server is running.
Once everything is configured you can run this test. The first time you run the test, it will install “Appium Settings” on your device, and then the test will launch right after.
You can click on the green icon near the test to launch it or launch it via the command line with:
./gradlew test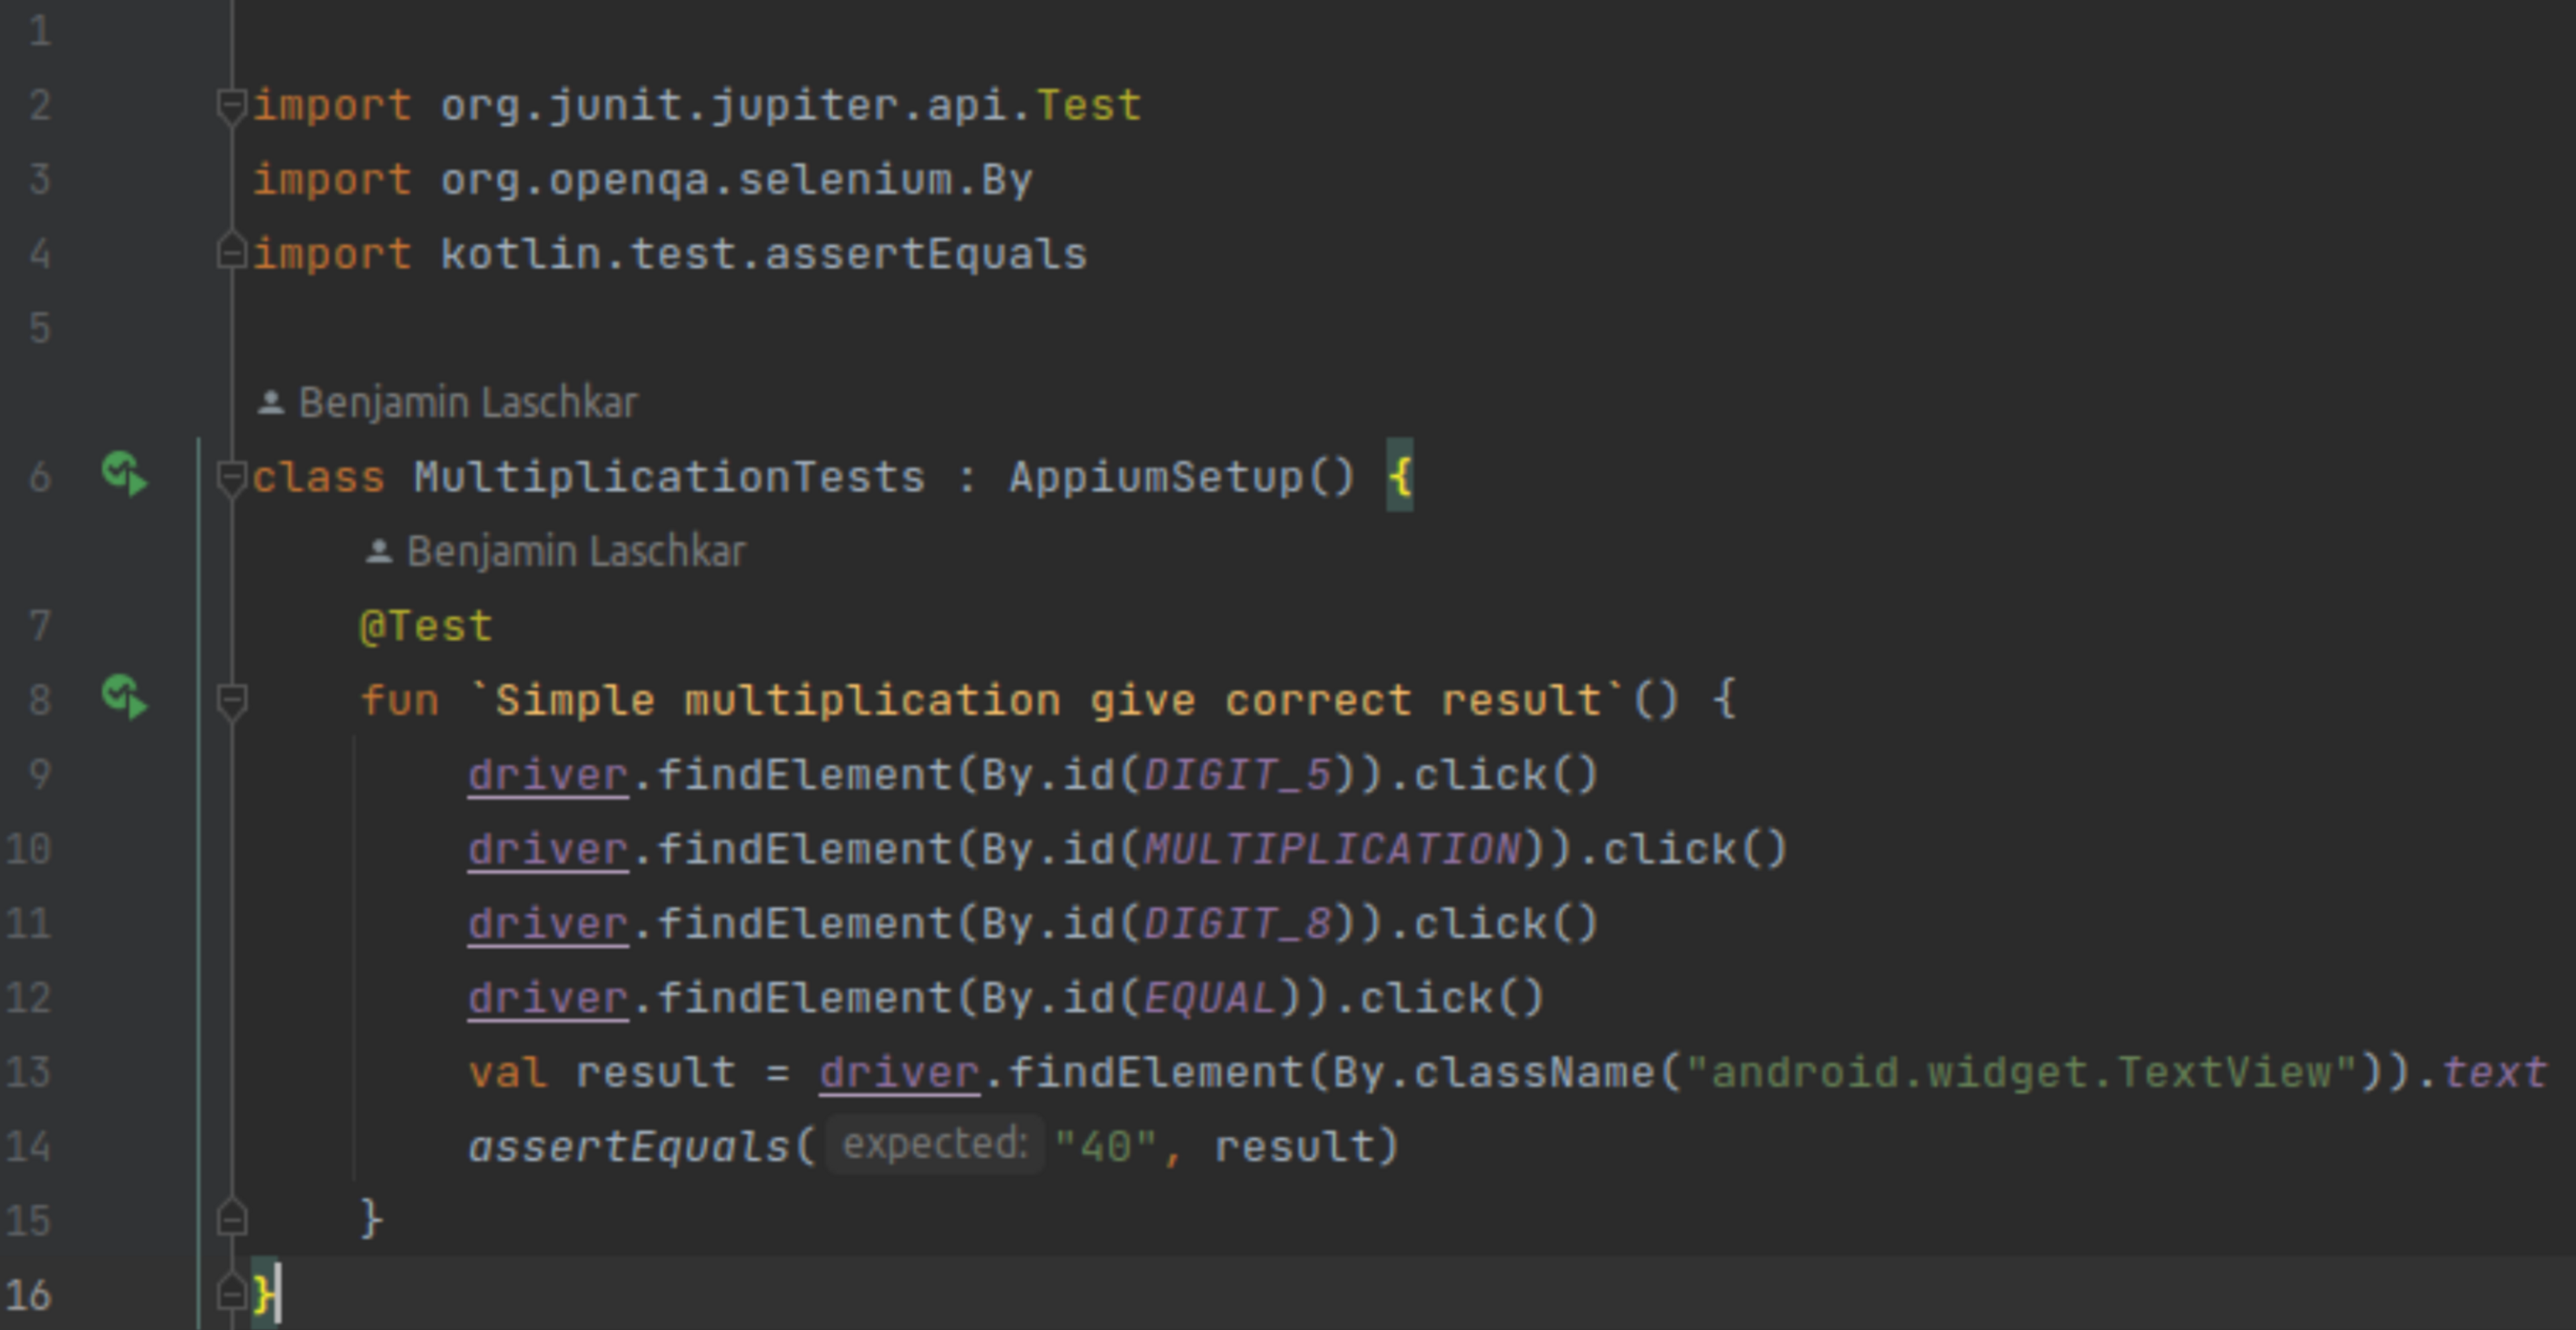
And voila! As expected 8 x 5 equals 40.
Running this test will automatically generate a JUnit report. You can find it under: .\build\reports\tests\test\classes\MultiplicationTests.html
Congratulations, you successfully launched your first Appium test! The full project is available here.